How To Remove Paint From Plastic Car Parts
Posted by Collectors Auto Supply on Jun 5th 2020
If you're in the process of restoring an old or classic car, you might find yourself at the point where you need to repaint plastic parts on the car. Perhaps the plastic parts are faded or the paint is worn and chipped. You might also want to change the color if you're repainting the car entirely.
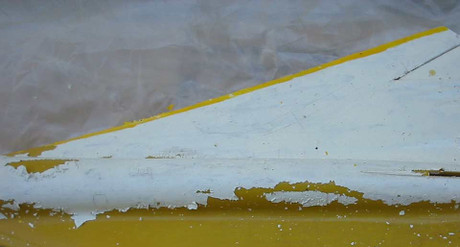
Before you decide on a plan of action, it's important to understand that there's a difference between dyed and painted plastics. Faded dyed plastic can usually be painted over, while painted plastic needs to have the paint removed first. As plastic doesn't have the same solid durability as metal, the only safe way to remove painted plastic is with a chemical stripper. You can't grind or sandblast paint off of plastic parts.
-You can't grind or sandblast paint off of plastic parts
Removing Paint With Chemical Stripper
Step One - Prepare Your Work Space
In order to use a chemical stripper, you need an area with plenty of ventilation. The area should also be protected from direct sunlight, wind, and rain. Start by laying plastic sheeting over the floor or ground of your work area. The chemical stripping material is hazardous and needs to be properly and easily cleaned up. Stained plastic sheeting is easy to dispose of versus trying to clean the chemicals off your floor.
Step Two - Prepare Your Car Parts
In general, you want to remove any plastic parts from your car that you intend to strip and repaint. Lay the parts out on the plastic sheeting. The next step is to scuff the paint with 80-grit sandpaper in order to make it easier to remove with the stripper. Wear a dust mask to prevent the inhalation of paint particles. You don't need to aggressively remove the paint, but just scuff it up a little.
Step Three - Prepare Your Tools
This part requires several important tools, including acid-resistant paintbrushes, metal coffee can or similar container, plastic or nylon scraping tool, protective clothing and eyewear, a respirator, and thick rubber gloves.
It's also important that you use a paint stripper that is specifically formulated for plastic and rubber. When you dress for the job, make sure that your body is fully covered. Wear long sleeves, long pants, socks, and shoes or boots. Paint stripper is extremely corrosive.
-Paint stripper is extremely corrosive
Step Four - Paint Stripping Method
Start by pouring some of the stripper into your coffee can or other container. Use the acid-resistant brush to dip into the stripper and then paint it on the plastic car parts. Make sure to look at and follow the instructions from the manufacturer as each type of chemical stripper has slightly different procedures.
Once the paint starts wrinkling or bubbling up, then you can use your scraper to remove the paint from the car part. You might have to apply a second or third coat of stripper depending on how many coats are on the original part.
Once it looks like almost all the paint is gone, apply a final lighter coat of stripper to the part. Rub it with a scouring pad to remove every small piece of paint. If the instructions require a neutralizer for the stripper, you can do that at the end.
How To Paint Dyed Plastic Car Parts
If you have dyed plastic parts on your restoration project, then the process is a little bit different. For example, if you have a dyed plastic part that was originally black, but is now faded, and you want to paint it the body color of your vehicle, say dark green. You can't remove dye from plastic parts like you can with painted plastic parts. The good news is that you won't need to go through the same hazardous chemical process.
Step One - Wash In Soapy Water
Remove your plastic car part and soak it in warm water with plenty of dish soap. Get a sponge with a scotch pad on the back and wash the part thoroughly, using the soft part of the sponge. Then use the scotch pad side to scuff up the surface of the part. This will give the new paint something to adhere to. Dry your part off really well with paper towels. This will remove an amazing amount of dirt, grime, and cleaner residue.
Step Two - Add Acetone and Paint
Use a clean cloth and soak it with acetone. Wipe the part down thoroughly with a layer of acetone. It will dry easily by itself and it will ensure that you don't have any dirt or oil on the surface of the plastic. At this point, you're ready to paint. Make sure to paint in a well-ventilated area with your plastic car part on cardboard or plastic sheeting as described in the previous section.
-Make sure to paint in a well-ventilated area
Spray light thin coats of the paint to avoid getting a splotchy finish. If you're changing the color of your plastic part, you'll want to put down about five or six coats. In some cases, you may want to use a flex additive before painting as this will help resist cracking in the paint later on. The paint you use may tell you if a flex additive is needed.
Where To Get Automobile Restoration Supplies
If stripping paint and repainting dyed plastic sounds like a lot of hassle, then you can also take the option of getting collector car parts already in the color that you want. Collectors Auto Supply sells a wide range of vintage car restoration supplies, including plastic parts in different colors. If you need to see how it's done you can check out this video.


